Backing Up Microsoft 365 SharePoint Data to Amazon S3: A Comprehensive Guide
SharePoint backup and Office 365 backup, in general, are an essential part of an organization’s data protection and security strategy. Microsoft 365 backups can be stored on-premises, but the recommended practice is to follow the 3-2-1 backup rule and store backup copies in the cloud too.
With the NAKIVO solution, you can implement this effective backup strategy to protect Microsoft 365 data in SharePoint Online as well as in Exchange Online, Microsoft Teams, and OneDrive for Business. This blog post provides a step-by-step guide on how to back up SharePoint Online with NAKIVO Backup & Replication.

Preparing Amazon S3 for SharePoint Backup
Before configuring a backup to Amazon S3, you must meet some requirements and prepare the AWS cloud environment.
The IAM role should have enough permissions to create a bucket in Amazon S3, generate the access keys for the IAM role, and write data to the bucket.
The access key allows you to configure third-party applications to access your account’s AWS resources for the appropriate IAM role. You can get an access key in the IAM Dashboard of the AWS console:
- Click Users in the left pane.

- Click your IAM user.
- Select the Security Credentials tab and click Create Access Key.
- Hit Download credentials and save the credentials in a safe place.
In our example, we create a bucket called blog-bucket-001 and we are going to configure SharePoint backup to this bucket.

Configuring NAKIVO Backup & Replication for SharePoint Backup
Starting with NAKIVO Backup & Replication v11.0, you can back up Microsoft 365 data directly to a backup repository in Amazon S3. You can back up SharePoint Online, Exchange Online, OneDrive for Business, and Microsoft Teams. This functionality also supports Microsoft 365 backups to other public clouds and S3-compatible platforms as well as backup copying to tape.
To configure SharePoint Online backup to Amazon S3, you must add all needed items (AWS and Microsoft 365 accounts) to the inventory, install the Transporter in AWS, and create a backup repository in Amazon S3.
Adding AWS to the inventory
Perform the following steps to add an AWS account to the inventory:
- Open the web interface of NAKIVO Backup & Replication.
- Go to Settings > Inventory and click + to add a new item to the NAKIVO inventory.

- The Add Inventory Item wizard opens.
- Select Cloud Storage at the Platform step to add Amazon Web Services. Hit Next at each step of the wizard to continue.
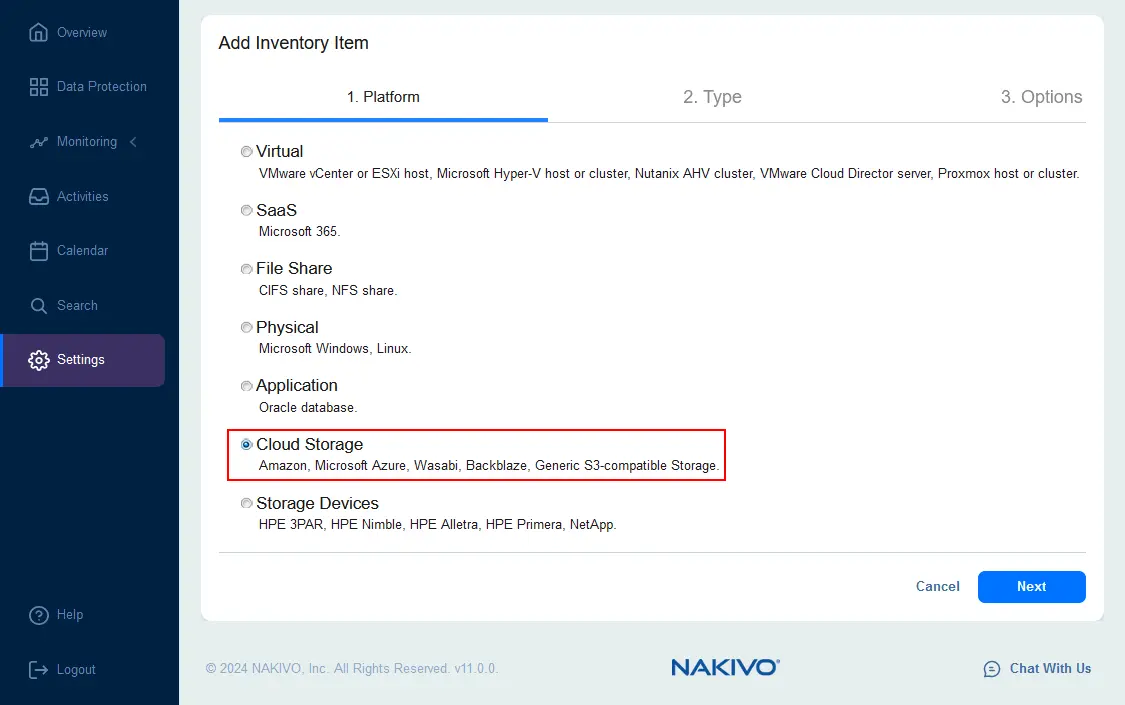
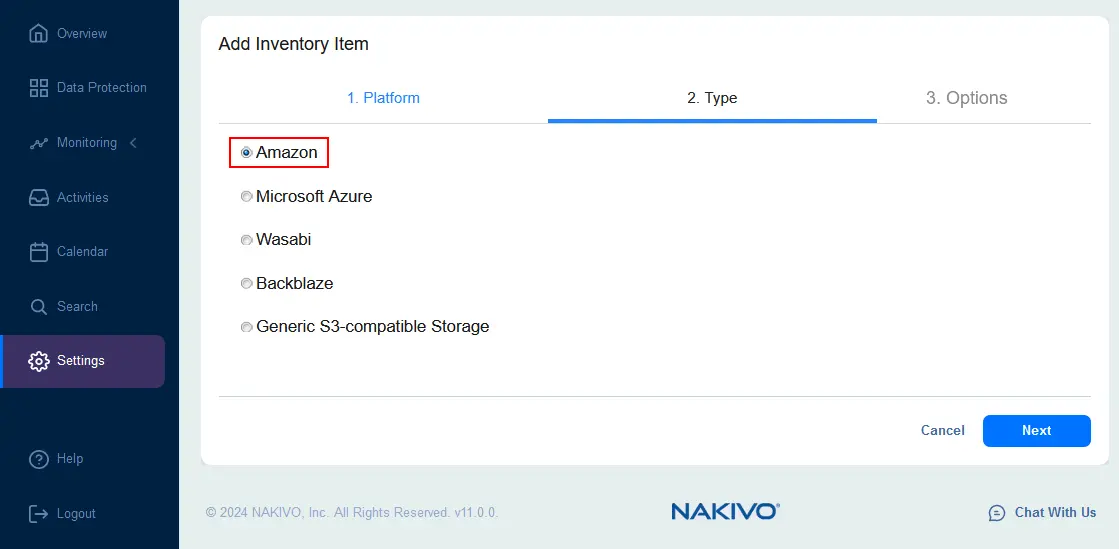
- Select Amazon as a platform type.
- At the Options step, enter the display name and the required parameters to add AWS to the inventory.
- Type: AWS account
- Region(s): All regions (or select a custom region if needed)
- Access key ID: Enter the access key ID generated and downloaded in the AWS IAM console (web interface) before.
- Secret access key: Enter the appropriate secret access key for the access key ID.
Hit Finish to save settings and add the AWS account to the inventory.

Adding Microsoft 365 to the inventory
Once the AWS account has been added to the inventory successfully, you need to add a Microsoft 365 account to the inventory. Then we will be able to configure SharePoint Online backup.
- In Settings > Inventory, click + to add a new item to the inventory.

- The Add Inventory Item wizard opens.
- Select SaaS at the Platform step of the wizard to add a Microsoft 365 account. Click Next at each step to continue.

- At the Services step, enter a display name and select the Microsoft 365 services you want to back up. You can select all supported Microsoft 365 services or select only SharePoint Online if you want to configure only SharePoint Online backup.

Select the Use Modern Authentication with enabled MFA account сheckbox if MFA is enabled for your Microsoft 365 accounts.

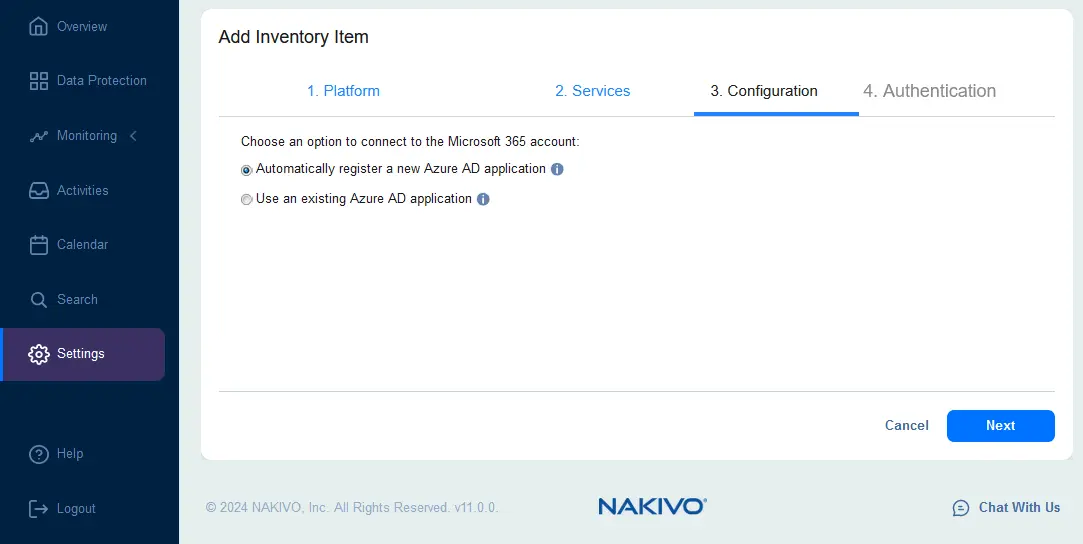
- At the Configuration step, choose an option to connect to the Microsoft 365 account. There are two options:
- Automatically register a new Azure AD application
- Use an existing Azure AD application
If you have not configured Azure AD to back up SharePoint Online or Office 365 with the NAKIVO solution earlier, select the first option for automatic registration. We select the automatic registration option in our walkthrough.
If you have already configured Azure AD access to back up Office 365 data with NAKIVO Backup & Replication but have reinstalled or reconfigured the NAKIVO solution, then you select the option Use an existing Azure AD application.
- At the Authentication step, configure authentication for the NAKIVO solution to access Microsoft 365 data for backup.
A code is displayed in the Code field. Copy this code to your clipboard and click the https://microsoft.com/devicelogin link to open the corresponding Microsoft page in a new tab of your web browser and configure authentication.

- Enter the code you have copied before in the Enter code field on the Microsoft website. Log in as a Microsoft 365 administrator if you have not already logged in.
- Are you trying to sign in to Microsoft Azure CLI? Click Continue.
- If everything is correct, you should see the message:
You have signed in to the Microsoft Azure Cross-platform Command Line Interface application on your device. You may now close this window.

- Go back to the NAKIVO web interface. Click Manage Certificates on the Authentication screen.
- Click Generate Certificate in the pop-up window.

- Enter a display name and description for the certificate. Save settings.

- Select the added certificate in the Client Certificate drop-down list (NAKIVO11-blog01cert in this example). Then, you should see a message that the Microsoft 365 account is authenticated. Click Finish to save settings and add the Microsoft 365 account to the inventory.

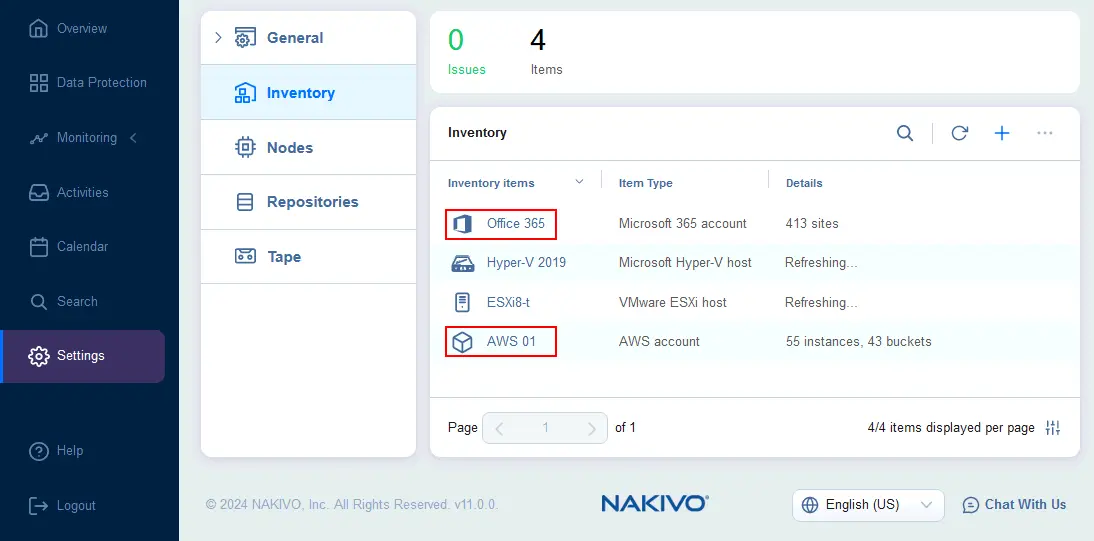
- Wait until the Microsoft 365 account is added to the inventory. The needed time depends on the number of items and the volume of Microsoft 365 data in your organization account.
Now, we have AWS and Office 365 in the NAKIVO inventory.
Deploying a Transporter in AWS
Once we have added AWS and Microsoft 365 accounts to the inventory, we must deploy an AWS Transporter. The Transporter is used to process backup data to AWS, including Amazon S3 as the destination.
- Go to Settings > Nodes, click the + button and click Amazon EC2 instance to add a Transporter in AWS.

- Set the options to deploy a Transporter in AWS:
- Transporter name: Enter a displayed name.
- Region: Select a region that you can access and that is optimal for you to deploy an EC2 instance with a Transporter in AWS.
- Instance type: Select an AWS EC2 instance type. The instance type depends on the Transporter load, which depends on the amount of data backed up. In our example, we select t2.medium.
- Networking: You can select an existing network (VPC) and subnet in AWS or automatically configure VPC for this Transporter. We select the existing network in our example. You can configure allowed traffic to this EC2 instance and set a Transporter port and data transfer ports (we use the default settings).
- Settings: Select the operation mode. We select Running while required to run the EC2 instance with the Transporter when backup or recovery jobs are running and to save costs for using AWS. This option is an alternative to Always running. Select a platform and maximum load. Linux is the optimal choice for deploying a Transporter in an AWS EC2 instance.
Hit Deploy to save settings and finish. Wait until the Transporter is deployed.

Now, the Transporter is deployed in AWS EC2 and displayed in the list of nodes in the web interface of the NAKIVO solution.

Adding a backup repository
After adding the AWS and Microsoft 365 accounts to the inventory and deploying a Transporter in AWS, we can now create a backup repository in Amazon S3 to store SharePoint Online backup data.
- Go to Settings > Repositories, hit + and click Create new backup repository.

The Create Backup Repository wizard opens.
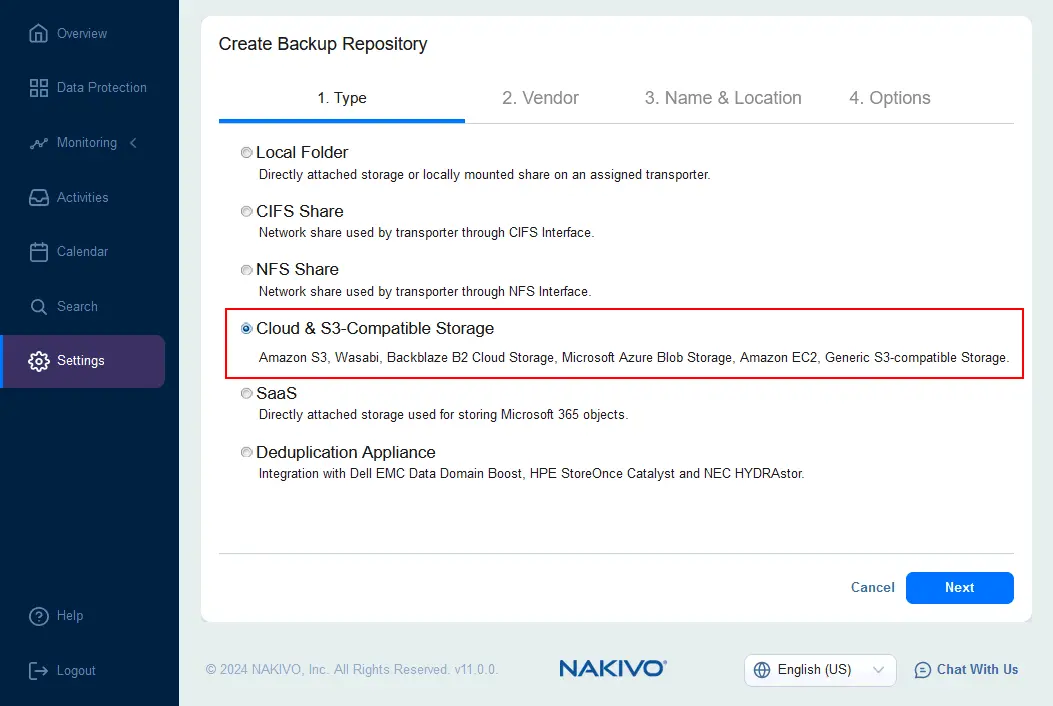
- At the Type step of the wizard, select Cloud & S3-Compatible Storage. Hit Next to continue.
- Select Amazon S3 at the Vendor step.

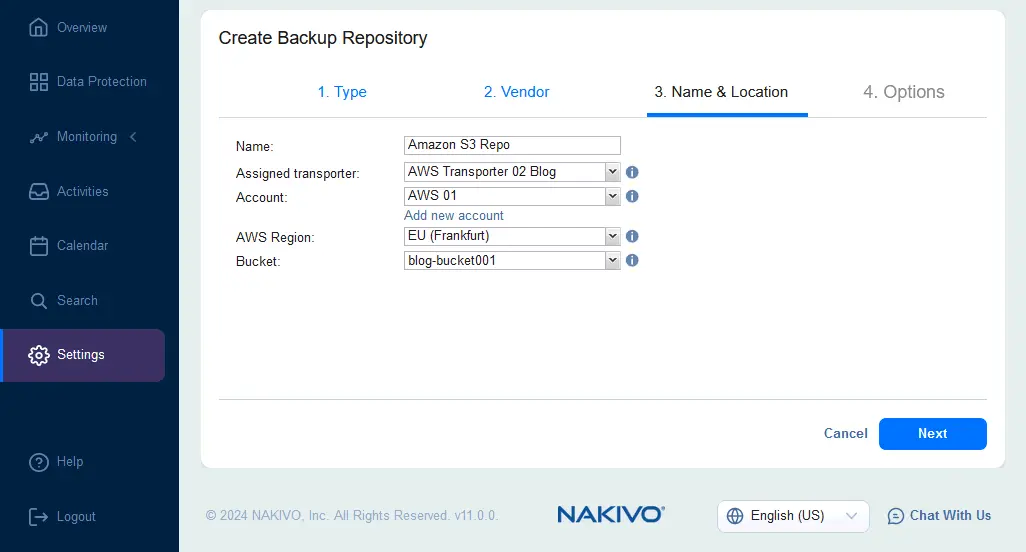
- Configure the backup repository Name & Location:
- Name: Enter a name to be displayed in the NAKIVO web interface, for example, Amazon S3 Repo.
- Assigned Transporter: Select the Transporter you deployed in AWS EC2. In our case, this Transporter is called AWS Transporter 02 Blog.
- Account: Select an AWS account added to the NAKIVO inventory at the first stage of configuration.
- AWS Region: Select the AWS region where the bucket you created for backups is located.
- Bucket: Select the Amazon S3 bucket. We select the bucket called blog-bucket001.
- Set backup repository options, such as storage savings, reliability, and scheduled detach if needed. Click Finish.
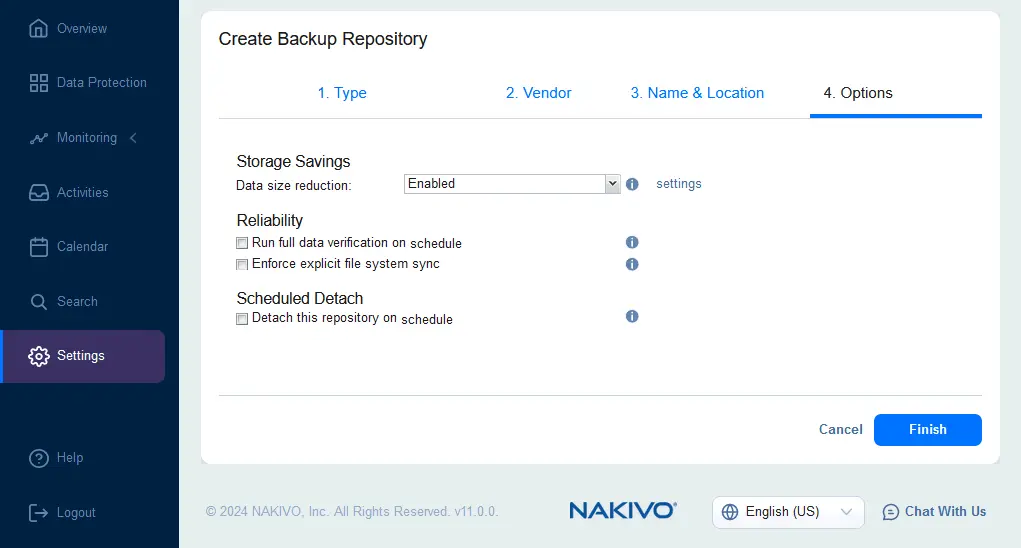
The backup repository in Amazon S3 has been created.

Creating a backup job
At this point, all the required components have been configured, and we can create a SharePoint Online backup job directly to Amazon S3. Similarly, you can back up other Microsoft 365 data, such as mailboxes, OneDrive data, and teams.
- Go to Data Protection, click + and hit Backup for Microsoft 365.

The New Backup Job Wizard for Microsoft 365 opens.
- Sources. Select the needed SharePoint sites to back up. Hit Next to continue.

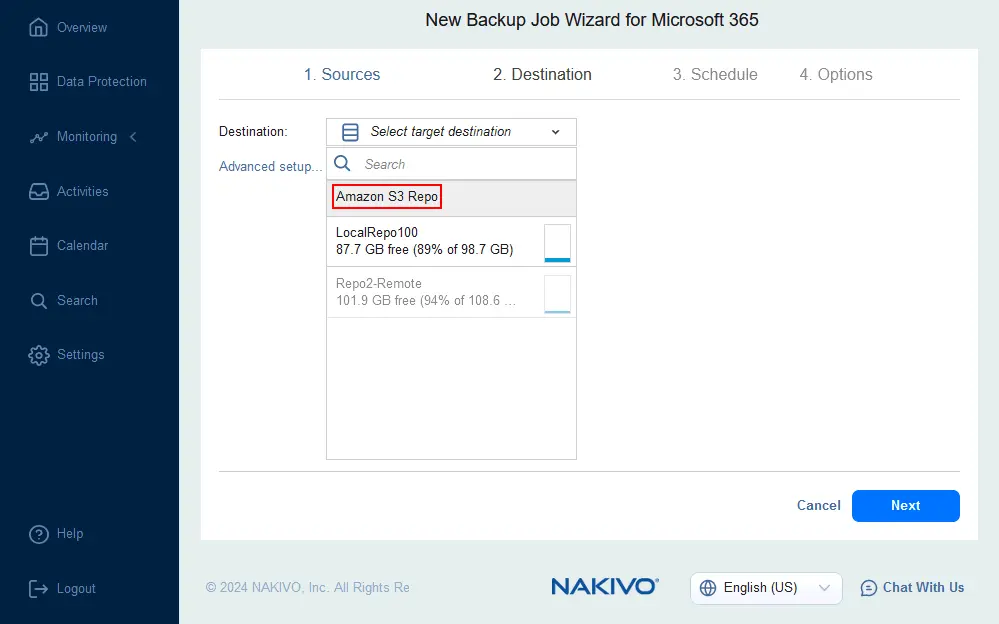
- Destination. Select the backup repository located in Amazon S3. In our example, this is Amazon S3 Repo.
- Schedule. Set scheduling and retention settings. If you have enabled Amazon S3 Object Lock for a bucket, you can apply backup immutability.
To enable S3 Object Lock in AWS Console, select a bucket, open the Properties tab and click Edit in the Object Lock section. Then, select Enabled, confirm and save changes. You can use the GFS retention policy.
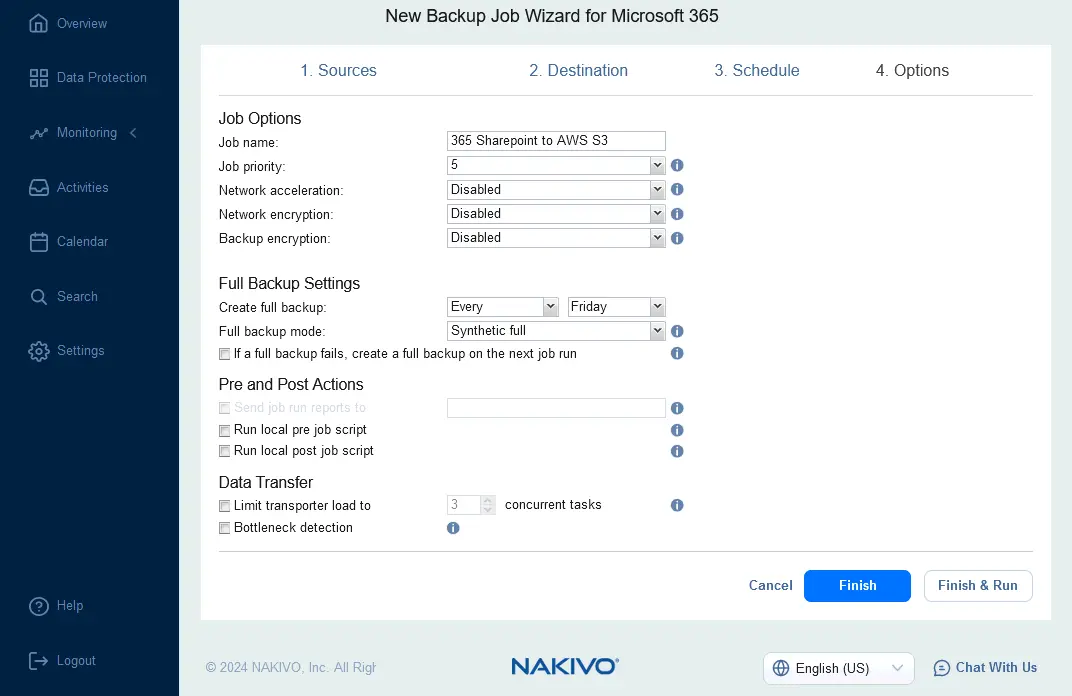
- Options. Set SharePoint Online backup job options. Enter a displayed name, for example, 365 SharePoint to AWS S3. Set the job priority, network acceleration, network encryption and backup encryption settings, as well as full backup settings.
Note that network encryption is used for encrypting data during transfer and backup encryption is used for storing encrypted backups in AWS S3.
Click Finish & Run to save settings and run this SharePoint backup job.
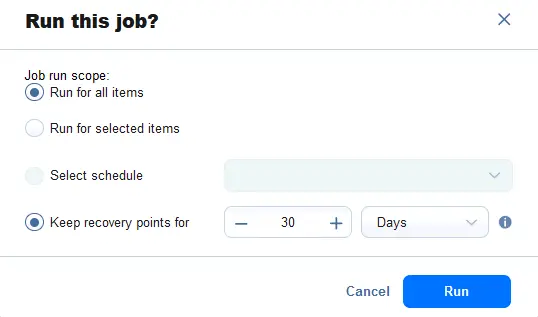
- Confirm the job scope and the time to keep recovery points, then hit Run.
Wait for the job to be completed. Our SharePoint online backup job to Amazon S3 has completed successfully.